Wednesday, December 24, 2008

Merry Christmas & Seasons Greetings to All

I want to thank each and every one of you for supporting this blog and sending your well wishes. I want to wish everyone a very Merry Christmas and a blessed & prosperous New Year.


Take this time to reflect and give thanks for what you have. Resolve to be kinder to people and to step up your game for the new year. Leave the remnants of 2008 behind you and focus on all the greatness that 2009 will bring.


Now I'm off to put presents under the tree and have some milk & cookies. Merry Christmas!!


Adrienne Graham
Sphere: Related Content

Sunday, December 21, 2008

Apple Chicken Sausage

I love the Food Network. I am addicted to it. I'm always looking for new variations on my classic dishes and FN always delivers. While there are tons of recipes available on the web, not all are always that great or accurate. Cooking is mostly instinct and partly skill. I can create my own dishes from scratch (read: experimentation) or I can doctor up a good recipe to make it my own.

I was watching Rachel Ray and she made this amazing Chicken Apple Sausage. I've eaten beef sausage, pork sausage and turkey sausage. But never chicken sausage. So I went online and did some research and found a few Chicken Sausage recipes. But Rachel's hands down was the best. It was low maintenance, easy to make, and I didn't have to worry about stuffing meat in the casings. I've taken her base recipe and punched it up a little bit. It may be a bit too spicy for some people's tastes. But you can add or delete ingredients as you like.

Apple Chicken Sausage Patties

Ingredients:

Olive Oil
2 lbs Ground Chicken
2 tart Grannie Smith (Green) Apples grated
2/3 cup onion fine diced
1/2 cup bread crumbs
1 tsp minced garlic
2 tsp fennel seed
1/2 tsp cracked black pepper
1 tsp paprika
1 tsp cayenne pepper
1/2 tsp salt
1/2 tsp thyme
1/2 tsp sage
1/2 tsp poultry seasoning

Heat pan with olive oil. Saute apples and onions until translucent. Add garlic to slightly brown (do not over cook garlic or it will be bitter & you'll have to start over). Remove from heat and allow to cool.

In another small pan, if you're using the fennel seeds, toast lightly then set aside.

In a bowl, add chicken, bread crumbs and seasonings. Mix well. Add cooled fennel seeds, onions, apples and garlic to meat and mix well. Form meat into small patties (or whatever size patties you prefer). You can then either bake or fry them in a pan with a little olive oil. Cook until nice and brown on both sides.

Serve with waffles, french toast, pancakes, eggs & grits or make breakfast sandwiches out of them. I tried them with some maple syrup. For a touch of extra sweetness you can add a little maple syrup to the meat mixture before cooking. You can also make them with smoked mozzarella cheese inside by forming the balls of meat around the cheese and shaping them concealing the cheese.

Enjoy!

Adrienne Graham Sphere: Related Content

Pound Cake Thieves!

OK, so last night I decided I wanted to make my Lemon Pound Cake as a test run for Christmas. I haven't made it in over a year, when I sent them as gifts. I figured I'd wait until everyone was asleep or otherwise occupied so I can get in the kitchen uninterrupted. I made my cake, did pretty well from memory too. It came out just the right height and density. So I sat it on the stove top to cool with the intention of glazing it this morning. Well, when you have a man and a growing man-child in the home, it's hard to keep stuff around for long...especially anything resembling a dessert. Look at what I woke up to this morning...

lemonpoundcake

Apparently, my son saw the recipe for the glaze on the counter and took it upon himself to make the glaze, put it on the cake and proceed to cut the cake. Him and his dad...who's supposed to be sick mind you...went to town on my cake. I didn't even get a chance to glaze and take a picture of it before it was cut! *Sigh* So go the hazards of living with cake thieves, pie pillagers and cookie monsters.

This is a really simple recipe. Keep in mind, that while this cake is relatively moist for a pound cake, they are not meant to be as moist as a regular cake, nor is the weight the same. Feel free to adjust or add flavorings as you see fit. You can add almond, chocolate, or any other flavorings as you wish. Just adjust to your taste.

Lemon Pound Cake

Ingredients:

2 cups all purpose flour (unsifted)
2 cups granulated sugar
2 sticks of unsalted butter (softened)
1/2 tsp salt
2 tsp baking powder
4 whole eggs (room temperature)
3/4 cup milk
2 tsp lemon extract (or more to suit your taste)
1 tsp vanilla extract

Preheat the oven to 350 degrees. Spray a bundt style cake pan with Crisco Flour Baking Spray (you can find it on the same shelf with Pam or any other cooking spray. It comes in a light blue can). Or you can butter and flour the pan the old fashioned way. My way is quicker.

In a bowl using a hand blender, cream together butter and sugar until well blended. Add 1 egg at a time beating after each addition until blended. Then add vanilla extract and blend. Then add lemon extract and blend. Do not over blend. Set aside.

In another bowl, add flour, baking powder, salt and blend together well. Take the dry ingredient mixture and slowly add it to the butter mixture adding 1/4 of the flour mixture at a time. You do not want to use the blender for this. Use a rubber spatula and incorporate by hand. You don't want to over mix the batter. After all the flour mixture has been mixed well with the butter mixture, add milk. Give it a good stir until all the ingredients are combined.

Next, pour or spoon the batter into the pan. You may want to tap the pan on the counter a few times to get any air out of it. Put it in the oven in the center of the rack and bake for 40 minutes. Take the cake out and test it with a cake tester to make sure it is fully done. I usually pick the center most part of the cake. If the tool comes back clean, it's done. If some batter is on it, let it cook a few more minutes. You can also test by lightly pressing down on the cake with your finger tips (or a butter knife so you don't burn your hands!). When the cake has some spring to it, it's done.

When you take the cake out of the over, turn the pan over onto a cooling rack and remove the cake from the pan. Let the cake cool for about 20-30 minutes. Then glaze (or not glaze) and serve.

Lemon Glaze

Ingredients:

4 tbs powdered sugar
1 tsp vanilla extract
2 tsp lemon extract
Milk (just enough to make it a smooth consistency)

Combine ingredients in a cup. Blend until well incorporated. Let sit for a bout 2 minutes. Then drizzle slowly onto the cake. Let the cake sit uncovered until the glaze sets. Then serve.

Had my family not destroyed my cake, I would have garnished it to make it more festive. Next time, I'll have to take the cake to bed with me or set a boobie trap. LOL

Til next time.

Adrienne Graham Sphere: Related Content

Saturday, December 20, 2008

Christmas Traditions

I called my mom the other day to make plans for Christmas. My Mom, my brother and my sister in law are all coming up to Atlanta on Christmas Eve. When we were little, Christmas as always a huge thing at our house. We'd get up in the morning and my Dad would announce that he would be making the meals that day. We'd start off with a big breakfast, which we'd be too excited to eat....you know, toys and all...followed by a huge dinner at around 4PM. Traditionally we'd have a ham and a turkey and whatever side dishes he prepared. But the turkey and ham were the main staples. A lot of people get tired of those two meats, especially since they just had them a month ago at Thanksgiving.

I told my Mom I wanted to change things up a little. I haven't spent Christmas with my family in a few years. It's usually me, my son and hubby, unless we had friends come by. The two years prior to last year, I made a duck. The first year I made it with a delicious plum sauce with wild rice, stuffing, cabbage and honey glazed carrots. The second year I roasted it with some small red potatoes, wild rice, green beans and dinner rolls. This year I wanted to make a goose. Well Mommy is not having that. She told me she was bringing her turkey and ham with her! I laughed and told her it wasn't necessary. But she's not hearing me. She said she wants her dinner with her kids and grandkids to be traditional and she didn't want to try anything new. Granted it's MY HOUSE, but since this is the first time in years I've spent it with Mom & the family, I will honor her wishes and suck it up. Although, I was tired of turkey when I made it on Thanksgiving...and I only made the breast.

I'm thinking I can still throw in some other items to make it not so reminiscent of Thanksgiving. I'm going to have to work fast and work around my Mom. I'll tell you what though. She will NOT deprive me of my egg nog! I have some wonderful Jamaican Rum that I am dying to crack open.

While I haven't completely figured out the dinner menu quite yet, I have determined the breakfast menu:

French Toast
Eggs
Bacon
Sausage
Croissants w/different jellies and apple butter
Grits
Cranberry Pancakes
Orange Juice
Pomegranate Juice
Hot Chocolate

I know it's a lot. But you haven't seen my family. Boy, can they eat! I'm looking forward to it. I can't wait until Christmas night when we sit down with hot chocolate, cider, home made cookies and snacks and watch Christmas movies. It's not the same without Daddy, but at least I'll have my family together for the holidays. I'll be sure to post some Christmas pictures.

Seasons Greetings,

Adrienne

Sphere: Related Content

Monday, December 15, 2008

I'm in Cookie Heaven


Last night I had a sweet tooth. I didn't want to go to the store (not too fond of store bought baked goods). But I was too tired to bake. As I looked around my pantry, I decided I had all the ingredients to make just about any dessert in the world...literally. After some debating back and forth, I decided to go ahead and make my blissfully sinful Oatmeal Raisin Cookies. I wasn't in a chocolate mood. *shrugs* Now you must be thinking, what the heck is so blissful about Oatmeal Raisin Cookies. My hubby and my son always say it's the last cookie people will choose when put up against the likes of Chocolate Chip, Snickerdoodles, etc. They don't know what they're talking about.

Ordinarily I follow baking recipes to the letter. But with these cookies, I add a little extra something here and there to make them so blissful. Each person that I've made them for have had their own taste in Oatmeal Cookies. I've made them with diced apple, dried cranberries, dried cherries, even chocolate chips. On some versions I kick up the cinnamon content, in some I add pumpkin pie spice, in some I'll throw in some nutmeg. Sometimes I'll drizzle with icing. It all depends on what I'm feeling that particular day.

I'm sharing the basic recipe with you all today, but I encourage you to try your own version. I love these cookies and eating them warm, fresh out the oven with some ice cold milk makes me feel all giddy inside! LOL

Oatmeal Raisin Cookies

2 sticks of unsalted butter, softened
1 cup of light brown sugar (dark brown sugar if you want them sweeter)
1/2 cup sugar
2 eggs
1 tsp vanilla extract
1 1/2 cups of all purpose, unbleached flour
1 tsp baking soda (not powder!)
1 tsp cinnamon
1 tsp nutmeg
1/2 tsp salt
3 cups Old Fashioned Oats (I use Quaker but you can use a store brand)
1 cup raisins
1/2 cup of chopped nuts (optional)

Preheat the oven to 350 degrees. Take a cookie sheet and line it with parchment paper or you can lightly spray cooking spray directly on the cookie sheet.

In a bowl with an electric mixer, cream the softened butter and brown sugar. Once creamed, slowly add regular sugar. Then add eggs, one at a time until blended. Then add the vanilla extract. Set aside.

In another bowl, combine the flour, baking soda, salt, cinnamon, nutmeg. Add this mixture to the bowl with the butter mixture. Add SLOWLY so the flour doesn't end up on your floor! Once combined, slowly add the oats, then the raisins, then the nuts. Now, I generally start blending by hand when I get to the flour mixture so I don't burn out my mixer. Plus doing it by hand allows you to get everything, even the stuff at the bottom of the bowl.

If you're using a standard sized cookie sheet, you should be able to have three rows of 4 cookies each. I usually put a spoonful of batter for each cookie. You can make them as big or as small as you like. The ones in the picture above were a little over a spoonful. Bake the cookies for about 12 minutes. Set the timer and remove them exactly at 12 minutes. Allow cookies to cool on a rack and not on the cookie sheet. Don't worry about how they look. Remember, they continue cooking after you take them out. As they cool, they'll set and crisp up around the edges.
Repeat the process with a new sheet of parchment paper until there is no more cookie dough left.

If you want to save some of the dough, scrape the dough out of the bowl with a rubber spatula and put it directly on plastic wrap. Wrap tightly and store in the refrigerator or freezer. I would use within 3 days for best result (1 month if you freeze it).

This recipe yielded me 3 dozen cookies.

Adrienne Graham
Sphere: Related Content

Sometimes Simple is Best


One of the first dishes I taught my son to cook is pasta. He's not overly into cooking, but at times, he loves being in the kitchen learning from me. Pasta is the best dish or variation of dishes he knows how to make. He still hasn't mastered Lasagna yet, but that's ok. He'll learn.

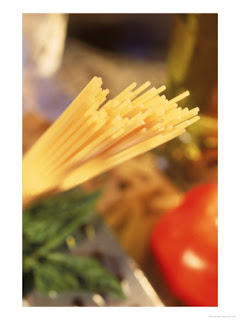
For those of you who feel you're "kitchen illiterate", pasta is the safest bet. But you need to pay attention to what you're doing so you don't overcook the pasta. Can't have mushy pasta. I'm going to share two of the simplest pasta dishes you can make. There is no way you can go wrong with these recipes. Today I'm sharing my recipes for a simple Spaghetti & Meatballs with Meat Sauce (I know, that's a lot of meat but you won't be able to tell), and my Shrimp Broccoli Fettuccine that the guys on my son's football team love. You can make these dishes for two people, or a large group. You know how much you need to feed your household so edit or add accordingly. I do make a home made sauce, but for the sake of time and clarity, you'll be using jar sauce for both recipes. If you want to learn how to make home made sauce, contact me for lessons.


Easy Spaghetti & Meatballs
Ingredients:


1 Jar of 3 or 4 Cheese Pasta Sauce (Ragu, Prego, etc)
1 lb. Ground Turkey and/or Beef (you can use both)
1 Diced Medium Vidalia Onion
1 Diced Medium Green Pepper
1 Tbs Minced Garlic
1/2 Cup Diced Tomatoes
1/4 Cup Chopped Sun dried Tomatoes
1 Tsp Cracked Pepper
1 Tsp Onion Powder
1 Tsp Oregano
1 Tsp Basil
1 Tsp Parsley
1-2 Tsp Adobo Seasoning (according to your taste)
1 Bay Leaf
Extra Virgin Olive Oil
1 Box of Spaghetti or Linguine
Grated Parmesan Cheese
Italian Bread Crumbs
1 Egg


Start a pot of water to boil on low heat. Add a capful of Olive Oil and a tsp of salt to the water. Preheat the oven at 400 degrees.


On a cutting board, dice your onion, green pepper, tomatoes and sundried tomatoes and set aside. You can purchase fresh garlic or buy it already diced in a jar. Remember, this is supposed to be a quick meal so I'm trying to make it as simple as possible.


For the meatballs, combine in a bowl the ground beef and/or turkey, breadcrumbs, 1/4 of the onions, 1/4 of the green pepper, 1/4 of the garlic and a beaten egg. Then add the seasonings to your taste. Combine all of the ingrdients by hand until the are well blended. If you want to kick up the taste, you can add a shot of hot sauce to the mixture. Form small round balls out of the meat. Take a baking dish and lightly spray with Olive Oil Cooking Spray. Place meatballs on the baking dish and bake in the oven until slightly browned.


Heat a pot and add olive oil. Saute the 3/4 of the green peppers. Then add 3/4 of the onions. Once the onions are translucent, you can add 3/4 the garlic. Cook until slightly brown. Don't over cook or the onions and the garlic will burn and taste bitter.


Break up half of the ground turkey and half of the ground beef. Add meat to the pot and season with pepper, oregano, onion powder, adobo, basil and parsley. Now let me say that I always prefer to use fresh herbs and chop them myself. But if you can't find them, don't know how to pick them out or just don't want the hassle, you can use the dried herbs. Mix the meat, seasonings and onion, green pepper, garlic mix. Cook until browned. Then add the sundried tomatoes and cook for about two minutes. Drain the liquid and return meat to the pot. Add diced tomatoes, bay leaf and the pasta sauce. Cook on medium heat and stir. Allow the ingredients to blend together as they cook. Reduce the heat to low. Add the meatballs to the sauce and simmer over a low fire for about 15 minutes.


Add some grated parmesan during the last two minutes of cooking the sauce.
In the pasta pot, take the pasta out of the box, break in half (more so that they fit in the pot). Cook for about 7-9 minutes or until the noodles are firm yet tender. Drain the pasta into a colander then return to the pot. Add a capful of olive oil and toss the noodles. At this point, you can either combine and toss the pasta and meat sauce & meatballs in one pot, or you can serve the pasta on a plate and dress with the meatballs and sauce based on the tastes of your guests or family. Remove the Bay Leaf before serving or plating. You can garnish the pasta with some grated Parmesan and fresh minced parsley. Serve with a side of Caesar or House Salad and home made Garlic Bread.


Shrimp Broccoli Alfredo
Ingredients:


1 Jar of Alfredo Sauce (Ragu, Prego, etc)

1 lb. Shrimp (peeled, deveined & cooked- you can buy it prepackaged or have your grocer peel & devein so you can cook. For time's sake, we'll go with prepackaged)
1 Bag of Frozen Broccoli
1 Diced Medium Vidalia Onion
1 Diced Medium Green Pepper
1 Tbs Minced Garlic
1 Tsp Cracked Pepper
1 Tsp Onion Powder
1 Tsp Oregano
1 Tsp Parsley
1 Tsp Basil
1 Bay Leaf
1-2 Tsp Adobo Seasoning (according to your taste)
Extra Virgin Olive Oil
1 Box of Fettuccine
Grated Parmesan Cheese

Start a pot of water to boil on low heat. Add a capful of Olive Oil and a tsp of salt to the water.
In another pot, preferably a steamer pot, bring water to a boil. Insert the steamer basket and add broccoli. Steam with the lid on until bright green and firm.


On a cutting board, dice your onion, green pepper, and set aside. You can purchase fresh garlic or buy it already diced in a jar. Remember, this is supposed to be a quick meal so I'm trying to make it as simple as possible.


For prepackaged shrimp, be sure to thoroughly wash the shrimp and remove the tails.
Heat a pot and add olive oil. Saute the the green peppers. Then add the onions. Once the onions are translucent, you can add the garlic. Cook until slightly brown. Don't over cook or the onions and the garlic will burn and taste bitter.


Add shrimp to the pot and season with pepper, oregano, onion powder, basil, adobo and parsley. Again, I prefer to use fresh herbs and chop them myself. But if you can't find them, don't know how to pick them out or just don't want the hassle, you can use the dried herbs. Mix the shrimp, seasonings, onion, green pepper, and garlic. Cook until shrimp turn just about pink. They cook really fast and you don't want to overcook them. Drain the liquid and return shrimp, etc. to the pot. Add the alfredo sauce and the bay leaf. Cook on low heat and stir occasionally until the sauce is slightly bubbling. Allow the ingredients to blend together as they cook. Add some grated Parmesan during the last minute of cooking the sauce.


In the pasta pot, take the fettuccine out of the box, break in half (more so that they fit in the pot). Cook for about 7-9 minutes or until the noodles are firm yet tender. Drain the pasta into a colander then return to the pot. Add a capful of olive oil and toss the noodles. Remove the bay leaf from the sauce. Combine and toss the pasta, broccoli and shrimp alfredo sauce in one pot. Using tongs to toss will ensure that everything gets evenly distributed. You can garnish the pasta with some grated Parmesan and fresh minced parsley. Serve with a side of Caesar or House Salad and home made Garlic Bread.


Happy eating!


Adrienne Graham
Sphere: Related Content

Leftover Masterpieces

By now everyone should be sick of left overs. We spent the weekend with nothing but leftovers. I told my son & hubby that the left overs don't need to be the same old same old. I made sure to vaccum seal the food and put most of it in the freezer to preserve it. No need in leaving stuff in the fridge to let it go bad.

My son came to me last night and told me that he needed lunch for his trip today. I told him he could fashion up a great lunch right here in the kitchen. He looked at me crazy and said he wouldn't be able to heat up leftovers in the microwave. *sigh* I took him im the kitchen and made him get the turkey, stuffing, hot wing sauce, shredded cheese, ham, flour tortillas and lettuce. Again, a puzzled look. I had him place two tortillas in between damp towels and microwave until warm and soft. In a bowl, he shredded some turkey and added some hot wing sauce to a bowl and tossed until it was coated. He took one tortilla and spread a little of the warmed up stuffing in a thin layer, the coated turkey, and shredded cheese cheddar. I then had him put it in the over to warm it until the cheese melted. Once that was done, he added some lettuce then wrapped it. Voila! A buffalo turkey wrap. He loved it!

Then he decided to do a second one himself. He cut up some ham & warmed it, got some shredded italian blend cheese and put them on the tortilla. He warmed until the cheese melted, then added shredded lettuce and some honey mustard and made a second wrap. He had that with a side of macaroni salad and he was done. He premade his lunch (both wraps) for lunch today. It doesn't take much (in terms of food) to make my son happy.

There are many other ways you can turn your leftovers into tasty lunches. You have to be unafraid to get creative and bold with it. Leftovers don't need to be boring and bland. And if you have a pannini gril, George Foreman Grill, or even a waffle iron, you can get even more creative. For more recipe ideas, reach out to us at thymeoutformom @ gmail.com.

Adrienne Sphere: Related Content